This article involves exporting (copying) the contents of a message folder or entire mailbox to a Personal Folders file (.pst or .olm) using the Import and Export Wizard. This creates the backup .pst or .olm file. You can then copy the .pst or .olm file onto a CD or DVD for safekeeping or to move the data to another computer. There are a several reasons to export email from Outlook/Clemson Exchange, typically this is done to reduce the size of your online mailbox, or if the user is leaving the company, and wants to take their mail with them.
Important information you should know. Be sure to save your .PST / .OLM file to a location you can find, the default location is within a hidden folder deep in your user profile. It would be recommended to save it to your “My Documents” or “Desktop” for easy access.
EXPORT TO A PST FOR OUTLOOK 2007/2010 FOR WINDOWS
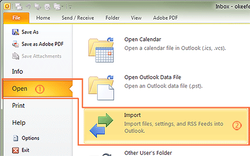
Step 1a: Outlook 2010 - Click the File Tab, click Open, click Import.
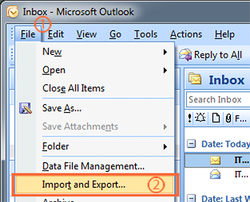
Step 1b: Outlook 2007 - On the File menu, click Import and Export.
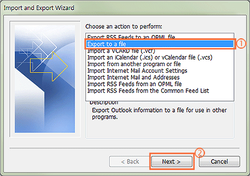
Step 2: 2. Click Export to a file, and then click Next.
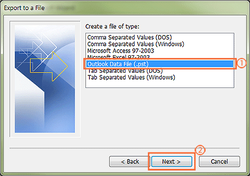
Step 3: In the list, click Personal Folder File (.pst), and then click Next.
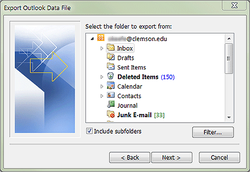
Step 4: 4. Click the folder that contains the messages you want to back up. If the folder contains a subfolder that you want to include, select the Include Subfolders check box, and then click Next.
Note: if you want to export the entire mailbox, make sure you select “Mailbox – Your Name” for 2007 or Your email address for Outlook 2010 and make sure Include subfolders is selected.
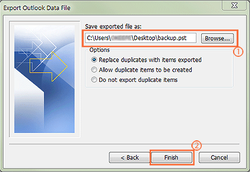
Step 5: Under Save exported file as, click Browse, and then specify a name and location for your backup file, for example, Mail Backup.
If you back up a .pst file that you have backed up to before, click one of the following:
Replace duplicates with items exported: Existing data will be overwritten with the information in the file being exported.
Allow duplicate items to be created: Existing data will not be overwritten, and duplicate information will be added to the backup file.
Do not export duplicate items: Existing data will be kept, and the duplicate information in the folder will not be copied to the backup file.
Click Finish.
EXPORT TO OLM FOR OUTLOOK 2011 FOR MAC
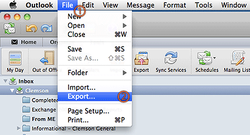
Step 1a: Outlook 2011 - On the File menu, click Export.
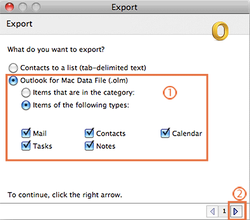
Step 2: Select your export options.
Click Outlook for Mac Data File (.olm)
Click Items of the following types:
Select the items you wish to export
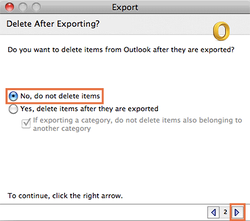
Step 3: Select the option “No, do not delete items”
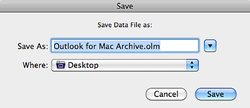
Step 4: 4. Type a name that is suitable for the backup file in the Save As: box, and select a location where you can easily find your exported file.
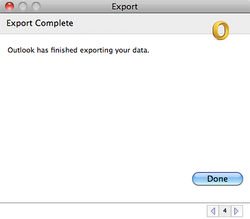
Step 5: 5. You’re all done. Click the Done button to complete the export process.

